Duration: 7 minutes For whom: Admin / Owner of an SME starting out on CyberPassport Prerequisite: Having created your account
After your first sign-in, CyberPassport guides you through creating your organisation. It is the container for your cybersecurity assessment — all your answers, evidence and reports will be attached to it.
Step 1 — Identify your company
On your first sign-in (with no existing organisation), you land on /onboarding.
- Enter the official name of your organisation (e.g. "ACME SA").
- Enter your Swiss IDE number in the format
CHE-123.456.789. - Click "Continue" (the zefix verification is automatic).
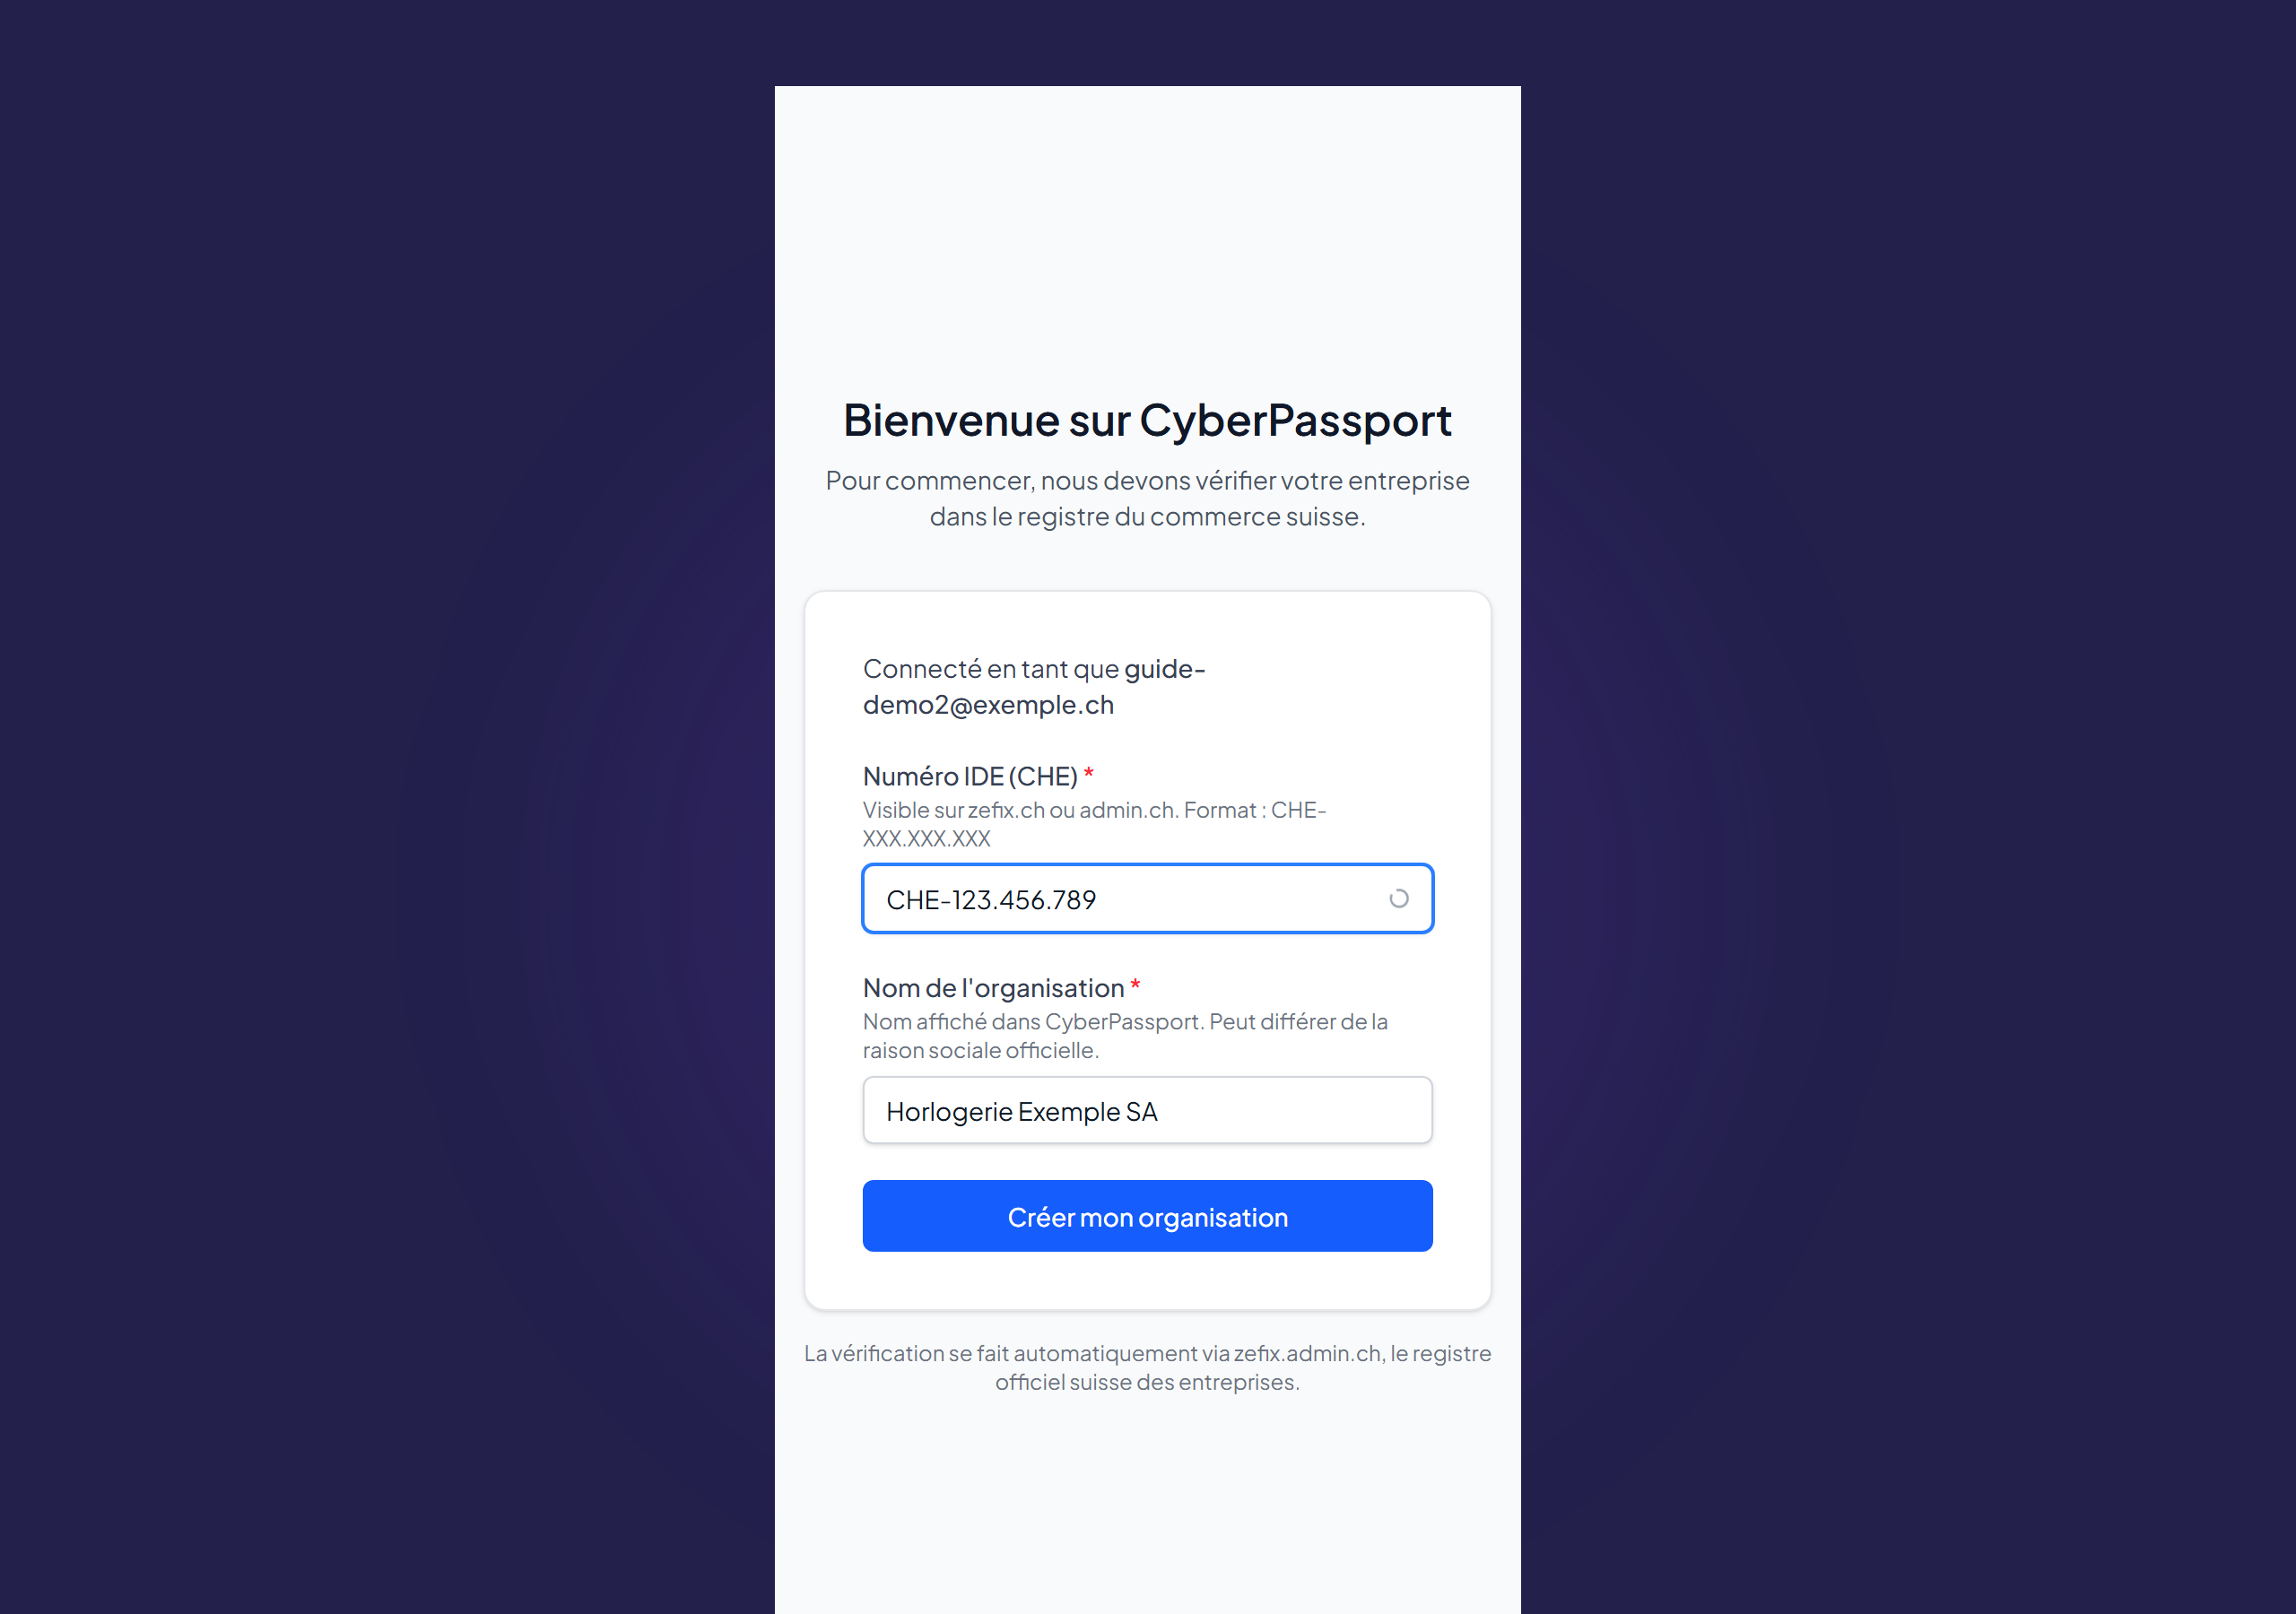
What happens?
CyberPassport queries zefix (the official Swiss commercial register) to verify:
- That your IDE indeed matches a registered company
- That the name you entered roughly matches the official record
If the verification succeeds:
- ✅ Your organisation moves to the "Verified organisation" status (green badge)
- The official name and registered office are imported from zefix
If zefix can't find your IDE:
- You see an error message
- You can "Continue without verification" ("Unverified" status)
- You can try again later from Settings → Organisation
💡 Good to know: the "verified" status is required to publish your assessment and to appear in the CyberPassport directory.
⚠️ Important: if your IDE number is already linked to an existing organisation on CyberPassport, you will see a warning. Ask an admin of that organisation to invite you rather than creating a new org.
Step 2 — Choose your cybersecurity frameworks
After the organisation is created, you are redirected to "Select your frameworks" (/onboarding/frameworks).
CyberPassport supports 4 frameworks in v0.9:
| Framework | Type | Description |
|---|---|---|
| NIST CSF 2.0 | Maturity | US framework — 6 functions (Govern, Identify, Protect, Detect, Respond, Recover) |
| ISO/IEC 27001:2022 | Maturity | International standard — 93 controls, 4 themes |
| nLPD | Mandatory | Swiss data protection act (always active) |
| Cyber-Safe | Swiss label | Preparatory self-assessment for the Cyber-Safe label — configured separately (see guide 04) |
Steps
- Tick the frameworks to activate (recommended: start with NIST + ISO).
- Click "Save".
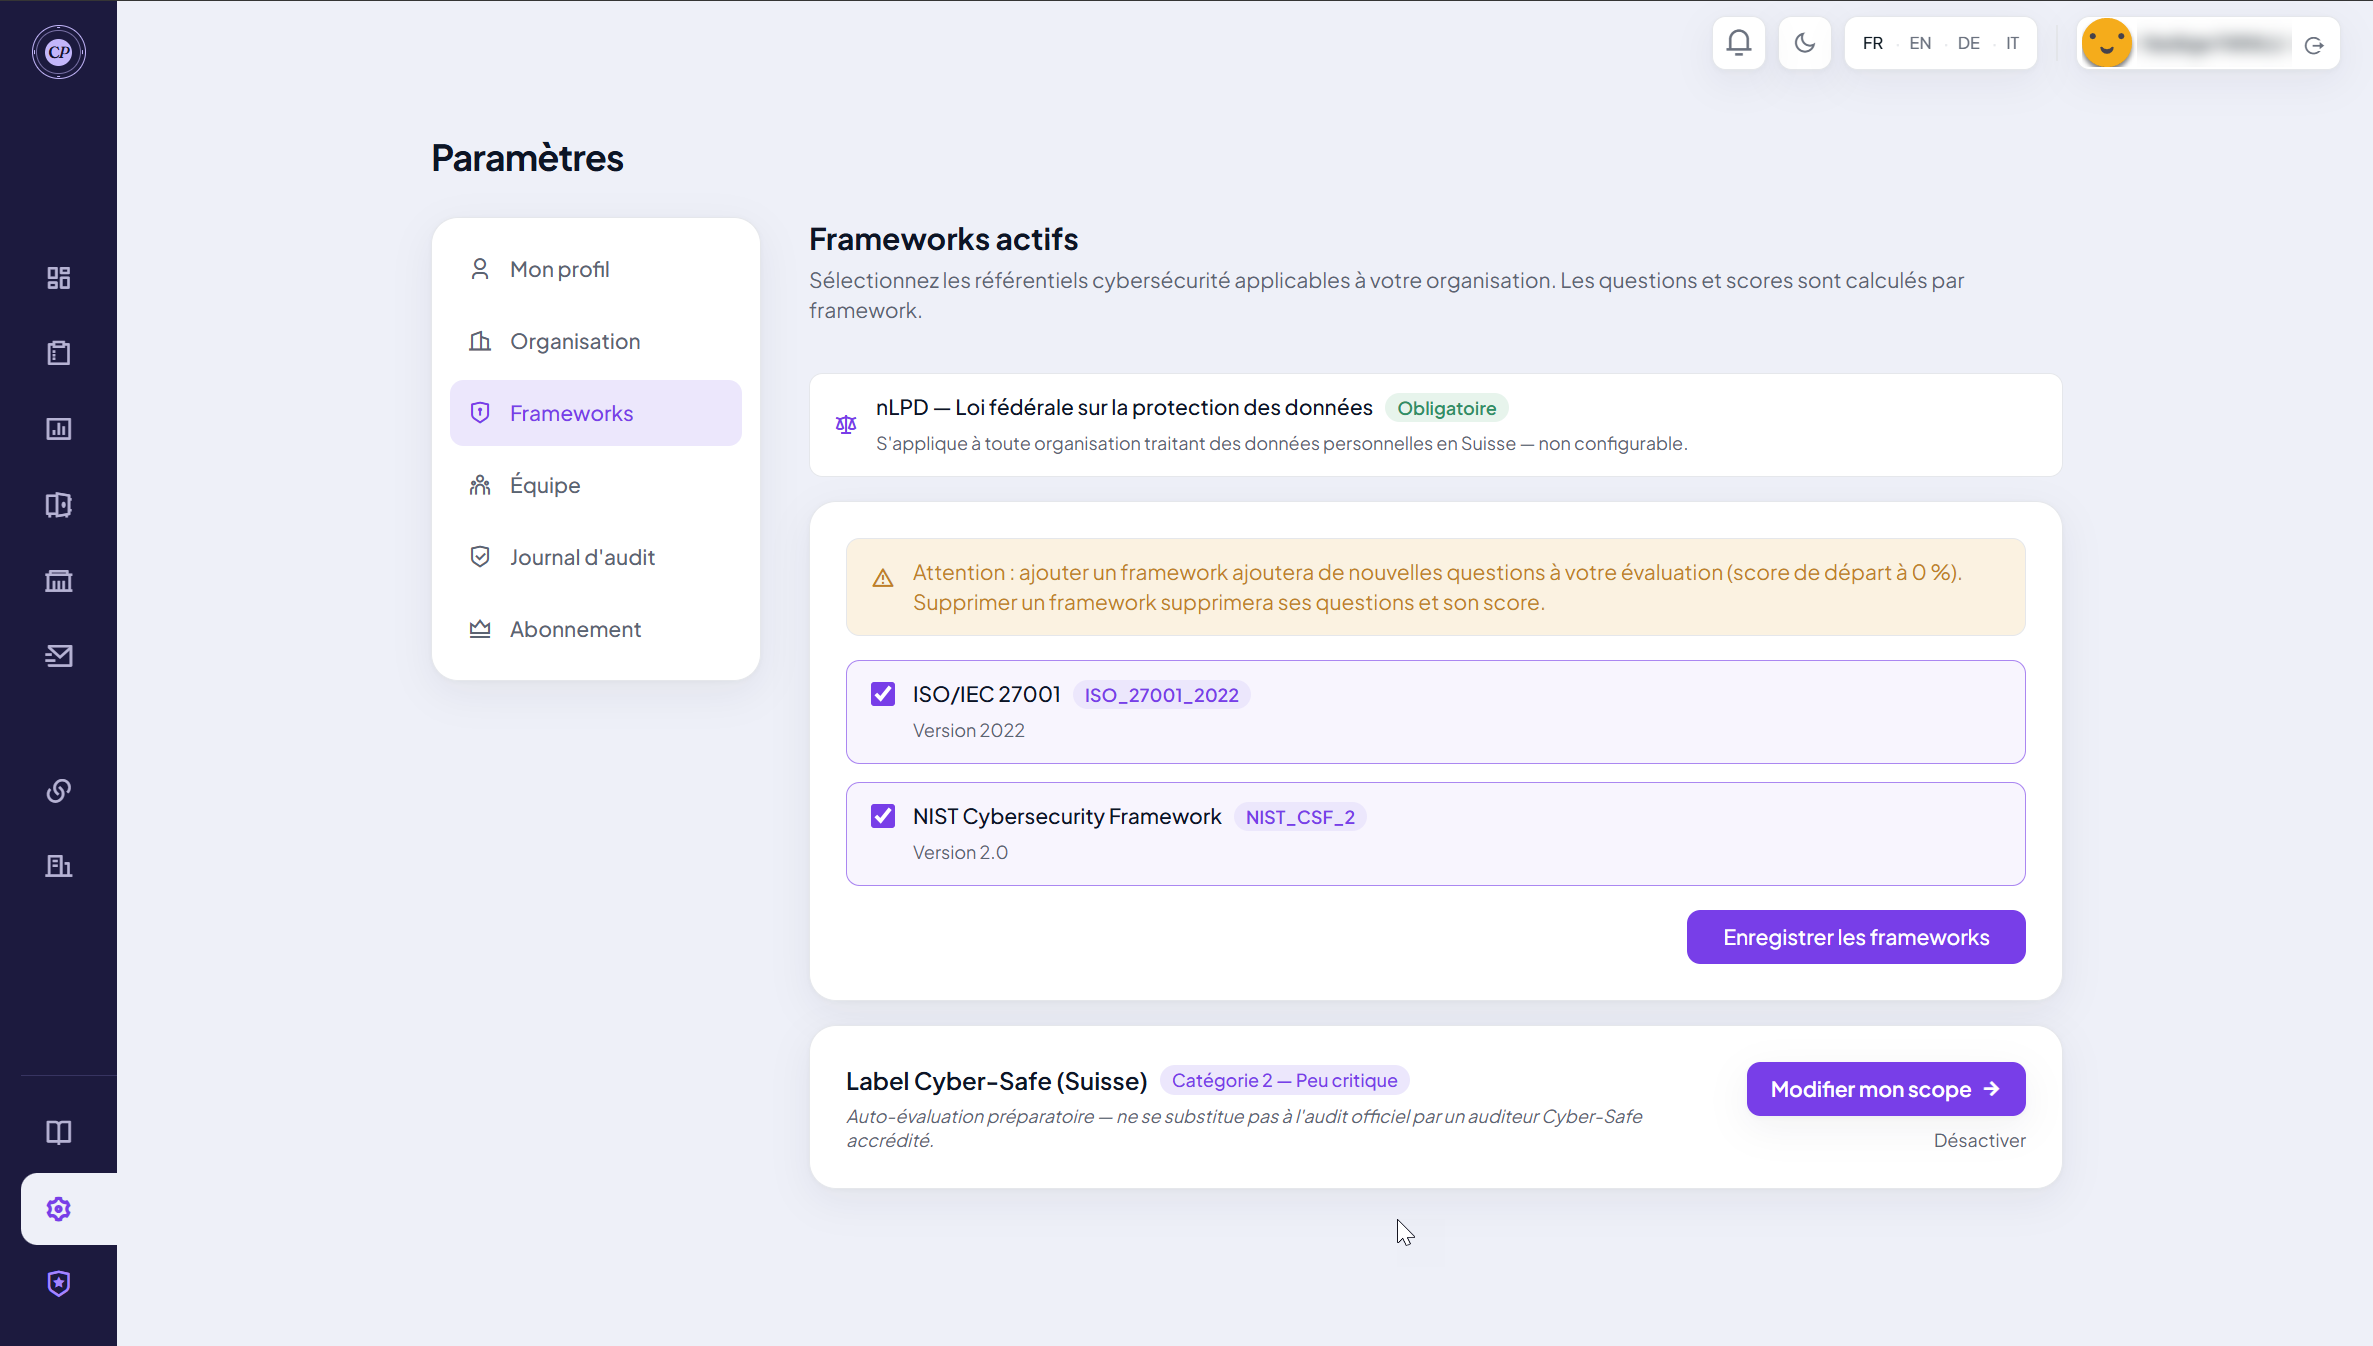
🟣 Tip: you can add or remove frameworks at any time from Settings → Frameworks.
⚠️ Important: the nLPD is mandatory for all organisations processing personal data in Switzerland. It is automatically active and cannot be disabled.
💡 Good to know: adding a framework adds new questions to your assessment (starting score at 0%). Removing a framework removes its questions and its score. A banner reminds you of this when you make a change.
Step 3 — Complete your organisation profile
Once the frameworks are chosen, go to Settings → Organisation (/settings/organization) to finalise:
- Display name (may differ from the zefix name if you use a trade name)
- Industry sector (Industry · Services · Technology · Watchmaking · etc.)
- Size (1–10 micro · 11–50 small · 51–250 medium · 250+ large)
- Short description (visible in your report and the directory)
- Logo (PNG or JPG, max 2 MB)
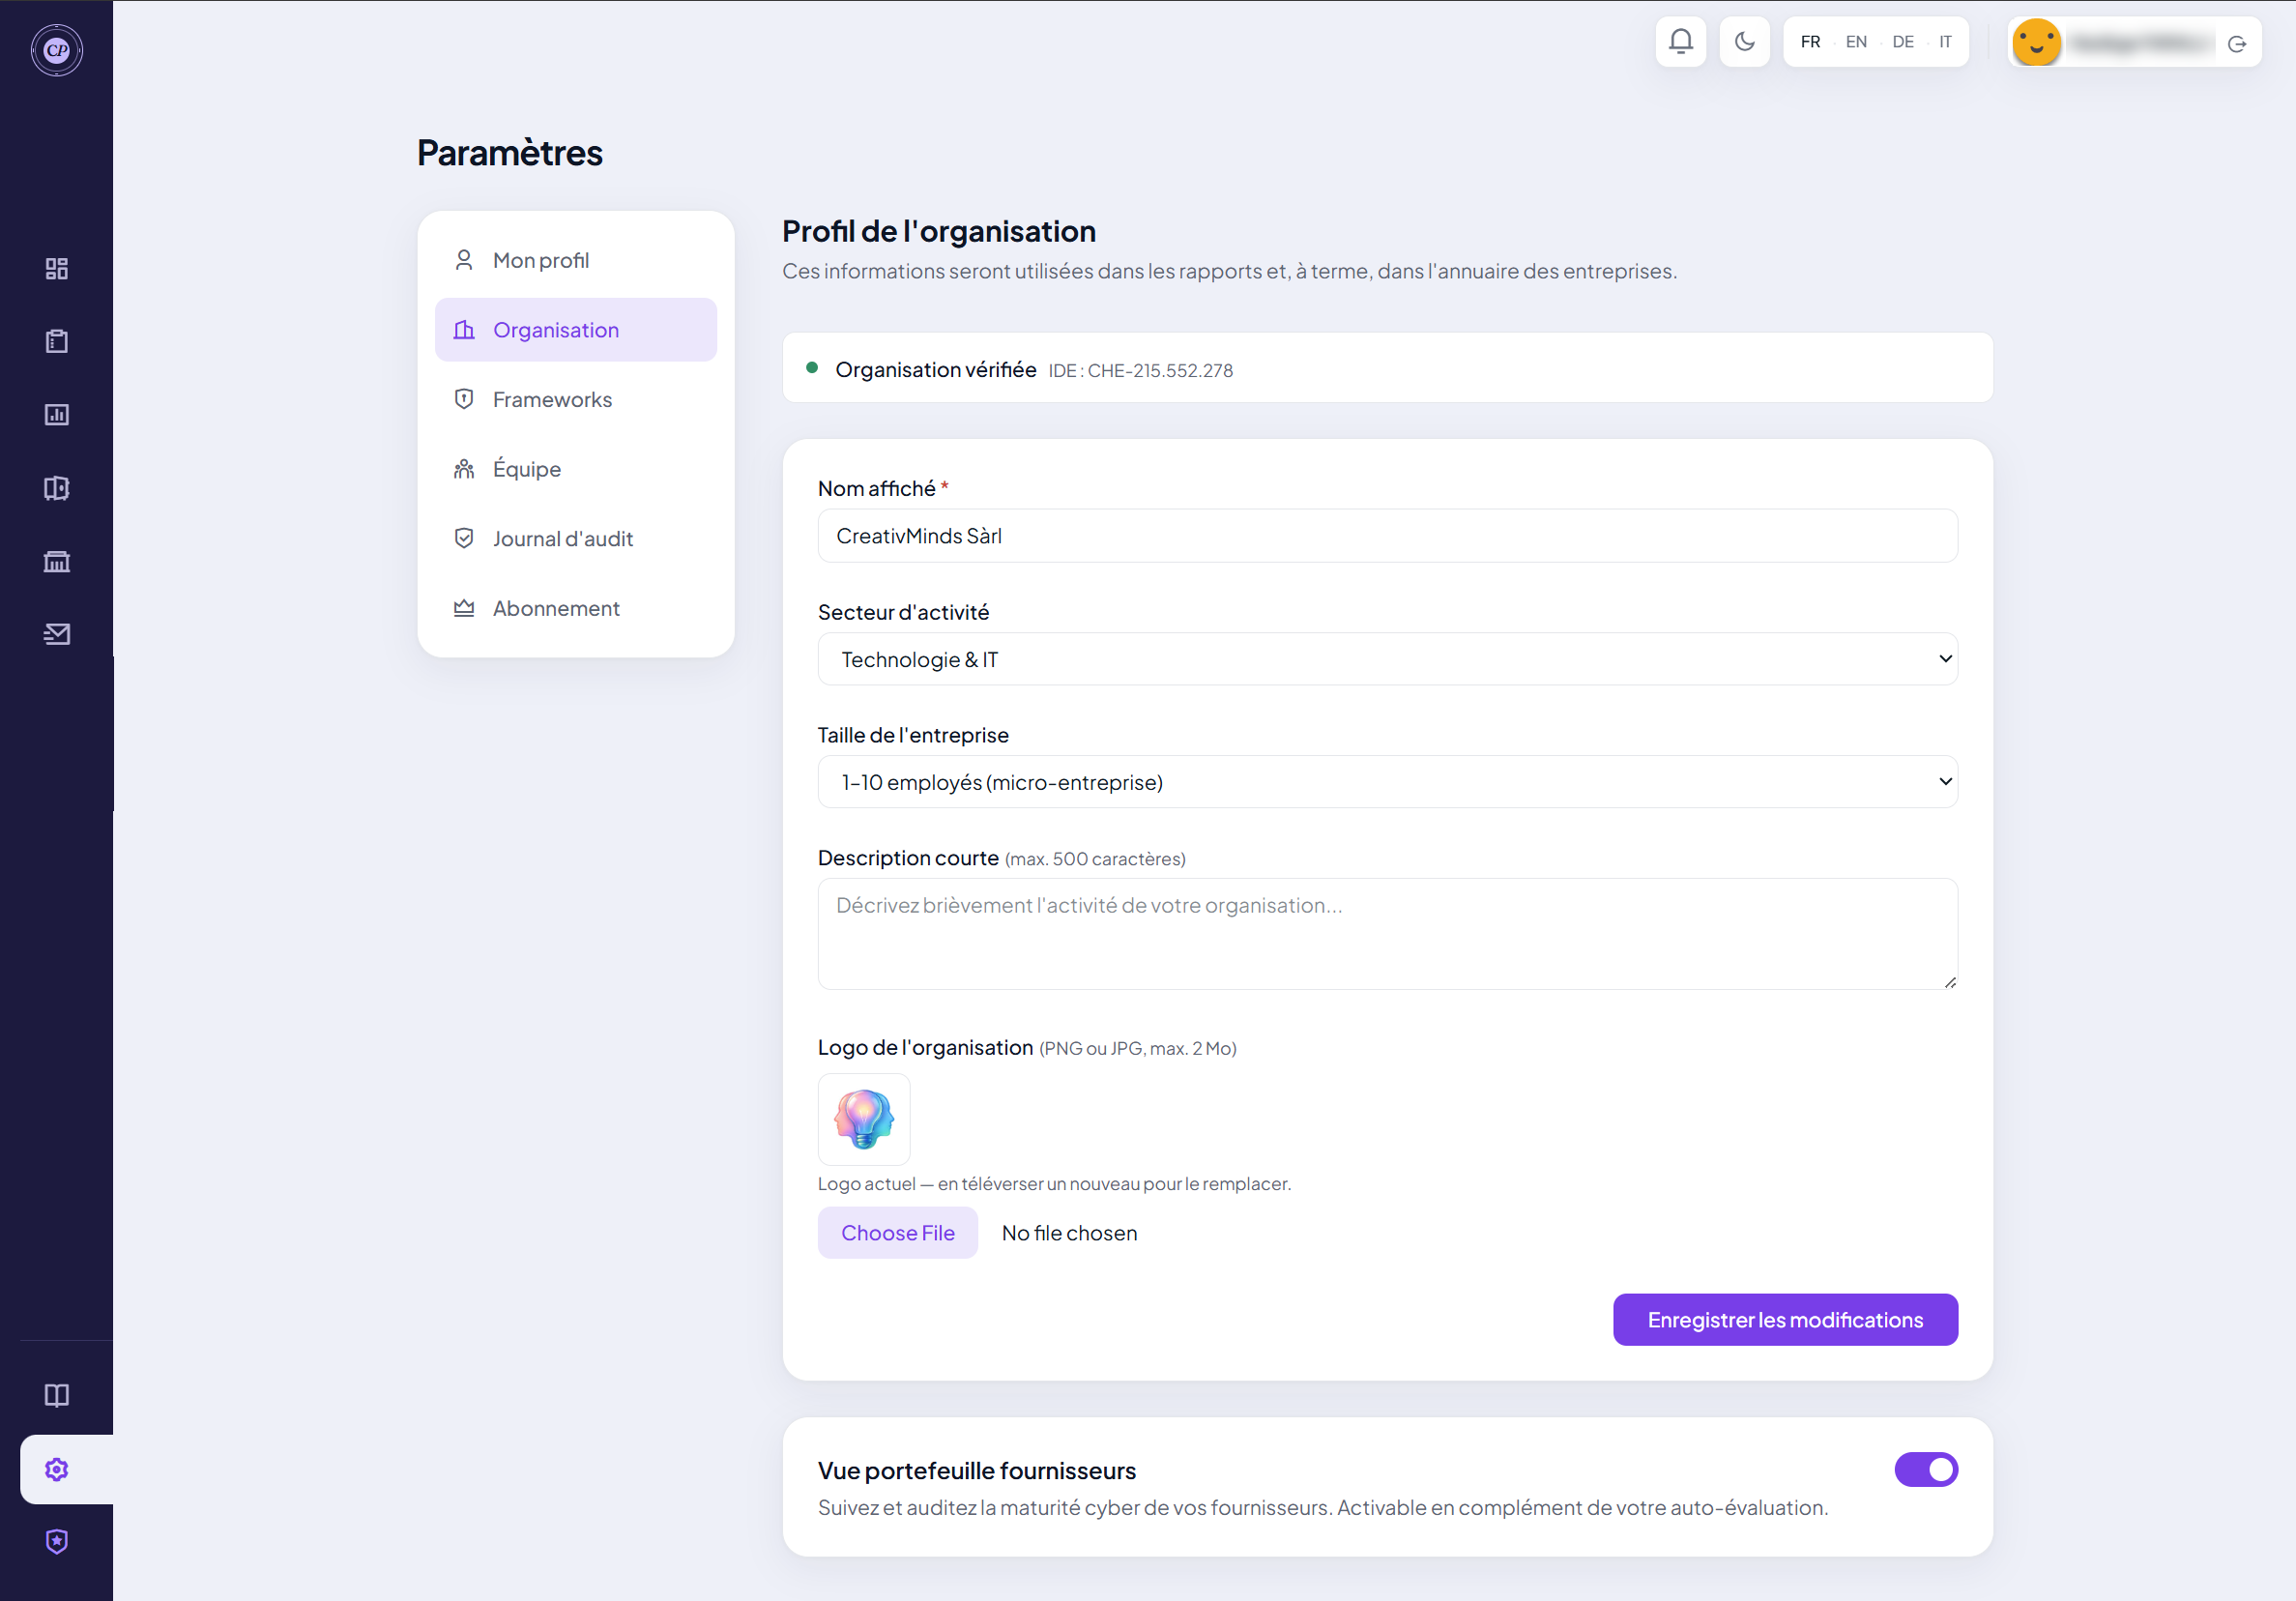
🟣 Tip: a clean logo + a clear description increase your customers' and auditors' confidence when they view your report.
Step 4 — Enable (optional) the Cyber-Safe label
If you are aiming for the Swiss Cyber-Safe label, now is the time to enable it to tailor the questionnaire to your exposure category.
→ See guide 04: Enable the Cyber-Safe label
Otherwise, go straight to the assessment.
Next step
→ Next guide: Assess my cybersecurity